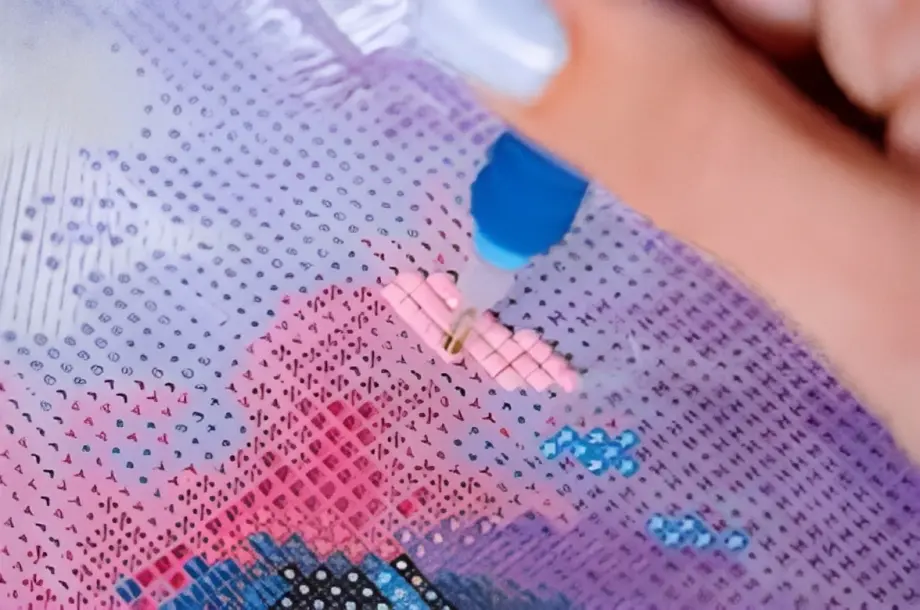
Diamond painting has gained immense popularity as a creative and relaxing hobby. It involves placing small resin or plastic drills onto a canvas to create a stunning mosaic-like artwork.
However, one common challenge that enthusiasts face is dealing with crooked drills. Crooked drills can diminish the overall appearance of the diamond painting, making it look untidy and unprofessional. In this article, we will guide you through the process of straightening diamond painting drills to ensure a neat and visually appealing final product.
Why straightening diamond painting drills is important
Straightening diamond painting drills is vital because it significantly impacts the overall look of the artwork. Crooked drills can create an uneven surface, causing gaps between the drills and affecting the clarity of the design.
By straightening the drills, you ensure a uniform and seamless appearance, giving your diamond painting a professional touch that will impress others.
Tools and materials needed
Before you begin straightening diamond painting drills, it’s important to gather the necessary tools and materials. Here’s what you’ll need:
Tweezers: A pair of fine-point tweezers will help you handle the small drills with precision.
Straightening pen: This specialized tool features a flat tip that allows you to straighten the drills efficiently.
Wax: Diamond painting wax acts as an adhesive, making it easier to pick up drills using the pen or tweezers.
Step-by-step guide to straighten diamond painting drills
To straighten diamond painting drills effectively, follow these step-by-step instructions:
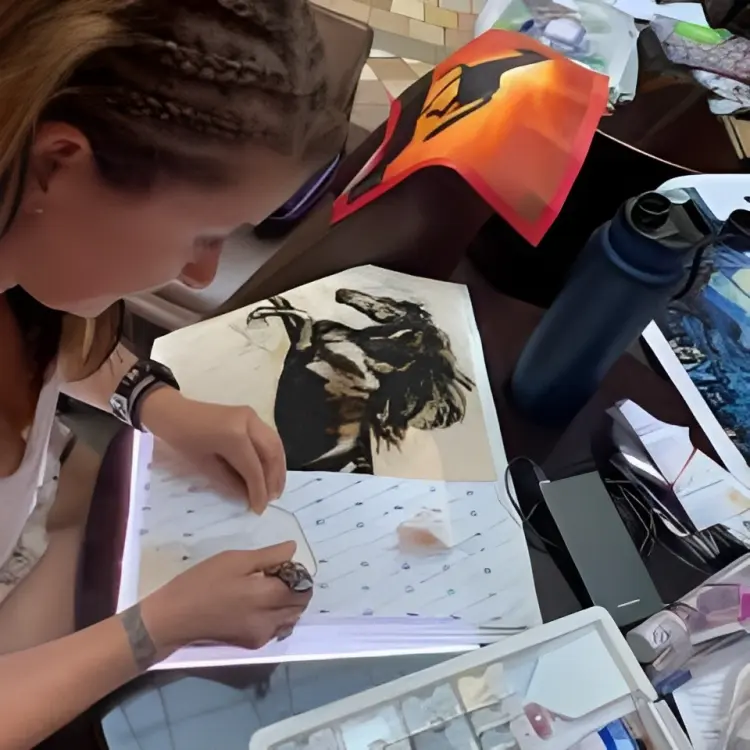
Preparing the workspace: Set up a clean and well-lit workspace where you can comfortably work on your diamond painting. Ensure there are no distractions or clutter that may hinder your progress.
Sorting and organizing drills: Before straightening the drills, it’s helpful to sort and organize them by color. This will make it easier to identify and locate the crooked drills during the process.
Identifying crooked drills: Examine the drills on your canvas carefully. Look for drills that appear bent or tilted in comparison to the surrounding ones. Mark these drills or make a mental note of their positions.
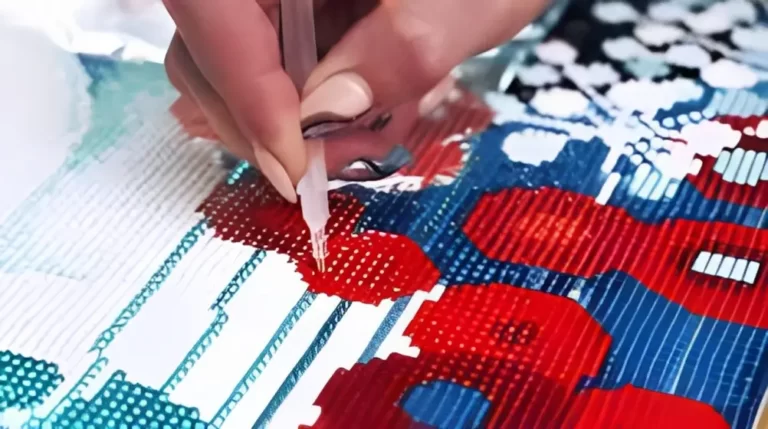
Using tweezers to straighten drills: Take a pair of tweezers and gently grasp the crooked drill. Apply gentle pressure to straighten it, aligning it with the surrounding drills. Be careful not to apply too much force, as it may damage the drill or the canvas.
Utilizing a straightening pen: If you have a straightening pen, you can use it to straighten the drills more efficiently. Press the flat tip of the pen against the crooked drill and gently guide it back into a straight position.
Applying wax to improve adhesion: Dip the tip of the straightening pen or the end of the tweezers into the diamond painting wax. The wax will help the drills adhere better to the canvas and reduce the chances of them becoming crooked again.
Rechecking and adjusting drills as needed: After straightening a drill, take a step back and examine the surrounding area. Ensure that the straightened drill blends seamlessly with the others. Make any necessary adjustments to achieve a uniform appearance.
Tips and tricks for effective drill straightening
To enhance your drill straightening process, consider the following tips:
Maintain a clean workspace: A clean and organized workspace reduces the risk of misplacing drills or accidentally knocking them out of place.
Use good lighting: Ample lighting is essential for identifying crooked drills accurately. Natural light or a bright LED lamp can help you see the details clearly.
Take breaks to avoid eye strain: Diamond painting requires prolonged focus on tiny details. Take regular breaks to rest your eyes and prevent fatigue.
Common mistakes to avoid
While straightening diamond painting drills, be mindful of the following common mistakes:
Applying excessive force: Applying too much pressure when straightening drills can damage them or cause the canvas to tear.
Neglecting to recheck: Failing to review the area after straightening a drill can lead to misalignments and inconsistencies in the final artwork.
Rushing the process: Take your time while straightening drills to ensure accuracy and precision. Rushing can result in overlooked crooked drills.
Maintaining straightened drills
Once you have straightened the drills, it’s important to maintain their position throughout the diamond painting process. Follow these tips to preserve the straightened state:
Handle with care: When handling the canvas, be gentle and avoid touching the drills directly. Touching them may cause them to shift or become crooked.
Store properly: If you need to store or transport your diamond painting, roll it gently with the drills facing inward.
This helps prevent any pressure that could dislodge the straightened drills.
Conclusion
Straightening diamond painting drills is a crucial step in achieving a professional and polished finished piece.
By following the step-by-step guide and utilizing the provided tips and tools, you can ensure that your drills are aligned neatly, resulting in an impressive diamond painting artwork. Remember to take your time, be patient, and enjoy the process of creating your masterpiece.
FAQs
A1. While any fine-point tweezers can be used, it’s recommended to choose tweezers specifically designed for crafts. These often have a better grip and precision, making the straightening process easier.
A2. Accidents can happen, and a drill may break during the straightening process. If this occurs, carefully remove the broken piece and replace it with a new drill of the same color and size.
A3. It’s not necessary to straighten every drill, especially if they are already positioned correctly. Focus on identifying and straightening the noticeably crooked drills to maintain a consistent appearance.
A4. While it’s possible to straighten drills before starting the project, it’s advisable to wait until they are placed on the canvas. Straightening them during the process ensures better accuracy and alignment.
A5. The time required to straighten drills depends on the size and complexity of the diamond painting. It can range from a few minutes for smaller projects to several hours for larger, more intricate designs. Pace yourself and enjoy the creative process
I'm William, a diamond painting enthusiast. Through my site diamond-paint.com, I offer tips, tricks, and resources for creating stunning works of art. Join me on this journey of self-expression and artistic fulfillment!
Diamond painting is a popular craft that involves placing tiny resin diamonds onto an adhesive canvas to create stunning and intricate designs. However, even the most experienced diamond painters may encounter an issue where their canvas refuses to lay flat. This can be frustrating, as a non-flat canvas not only hinders the painting process but…
Diamond painting is a beloved craft that allows enthusiasts to create stunning artworks using colorful rhinestones or diamonds. However, these delicate creations require proper care, especially during transportation. Whether you’re traveling for work or leisure, taking your diamond painting along can be an enjoyable experience. In this article, we will explore various tips and tricks…
Diamond painting is a popular and enjoyable craft that allows you to create stunning artwork using small resin diamonds. To achieve the best results, it’s important to properly section off your diamond painting. In this article, we will guide you through the process and provide valuable tips for effective sectioning. Understanding Diamond Painting Before we…
In the world of crafting, diamond painting has gained immense popularity for its therapeutic and creative benefits. This delightful craft involves placing tiny rhinestones, known as diamonds, onto a canvas to create stunning artworks. While traditional diamond painting produces captivating two-dimensional designs, many enthusiasts are eager to explore ways to add a captivating 3D effect…
Diamond Art and Diamond Painting are two popular DIY art forms that involve the use of small synthetic crystals to create stunning and sparkling images. While these terms are often used interchangeably, there are subtle differences between the two. In this article, we will explore the dissimilarities and help you understand which art form might…
Diamond painting is a popular craft that involves using tiny, flat-backed rhinestones or crystals to create colorful and sparkly artworks. However, one common issue that diamond painters may face is the presence of writing on the canvas, which can be distracting or interfere with the overall aesthetics of the finished piece. If you find yourself…


7 Comments