Diamond Painting: How to Seal?
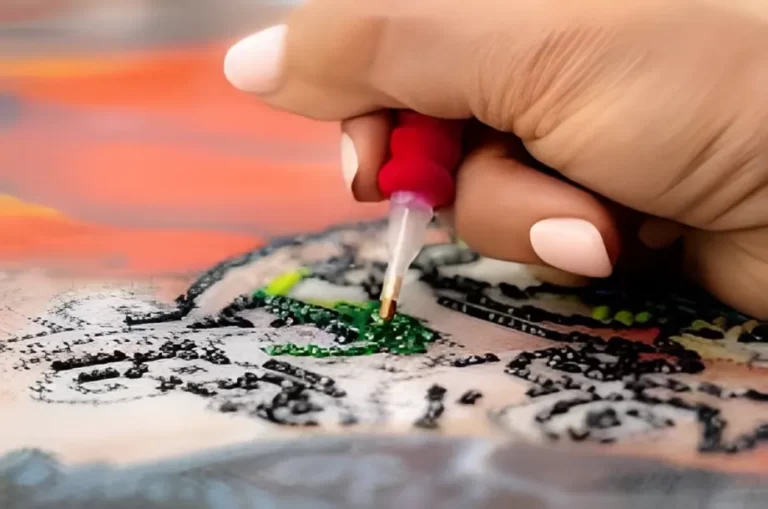
Diamond painting is a popular and relaxing craft that allows individuals to create stunning artworks using tiny resin “diamond” drills. Once you complete a diamond painting, you may wonder whether it’s necessary to seal it for protection and longevity.
In this article, we will explore the topic of sealing diamond paintings, discussing the factors to consider, the benefits and drawbacks of sealing, and providing a step-by-step guide on how to seal your diamond painting effectively.
Should You Seal Your Diamond Painting?
The decision to seal your diamond painting ultimately comes down to personal preference. However, there are a few factors you should consider before making a choice. Firstly, if you purchased your diamond painting kit from a reputable brand like Craft-Ease, it may not be necessary to seal it.
These kits often use high-quality poured-glue adhesive that securely holds the diamond drills in place. Additionally, if you plan to display your finished painting in a frame with glass protection, sealing may not be required as the glass itself provides a barrier against dust and damage.
Factors to Consider
When deciding whether to seal your diamond painting, there are a few important factors to keep in mind. One consideration is the trade-off between shine and protection. Sealing the painting can reduce the overall shine and sparkle, especially with the pearlescent effects of AB diamonds.
However, sealing offers benefits such as protecting the canvas against drills falling off and preventing dust and debris from accumulating between the diamond drills. Additionally, consider how you want to display your finished painting, as certain display options may require sealing for added stability and protection.
Benefits of Sealing
Sealing your diamond painting can provide several benefits. One significant advantage is the additional layer of protection it offers to both the canvas and the diamond drills.
By acting as a clear cement, the sealant ensures a unified and sturdy surface, reducing the risk of drills coming loose or falling off. Sealing also makes the surface of the painting easier to clean, as it creates a barrier against dirt and allows for gentle wiping with a damp cloth. Some sealants even have waterproof properties, further simplifying the cleaning process.
Drawbacks of Sealing
While sealing offers protection, it does come with a few drawbacks. One of the main trade-offs is the reduction in shine and sparkle. Sealing the diamond painting adds another layer on top of the diamond drills, which can diminish their reflective properties.
This effect is particularly noticeable with AB diamonds, which have a distinct glow that may be slightly muted after sealing. Additionally, sealing can alter the pearlescent effect, resulting in a slightly different appearance compared to an unsealed painting.
Preparing Your Diamond Painting
Before sealing your diamond painting, it’s crucial to ensure that the canvas is in the best possible condition. Start by flattening the canvas, as any wrinkles or creases can become permanent once the sealant is applied.
There are various methods for flattening a diamond painting canvas, such as using heavy books or applying gentle heat with an iron (using a protective cloth). Choose the method that works best for you and follow the appropriate instructions.
Cleaning the Canvas
A clean canvas is essential before applying the sealant. Make sure to remove any dirt, dust, or debris that may have accumulated on the surface of the painting. You can gently brush off loose particles with a soft brush or use a lint roller to pick up any stray fibers.
Avoid using liquids or harsh cleaners, as they may damage the adhesive or affect the diamond drills’ adhesion.
Working Environment
When sealing your diamond painting, it’s crucial to work in a well-lit and well-ventilated room. Some sealants contain chemicals that may release fumes or irritants.
Adequate ventilation will help dissipate any odors and ensure a safe working environment. Additionally, ensure that your workspace is well-lit, as this will allow you to see the diamond drills and ensure an even application of the sealant.
Sealing Methods: Spray-on vs. Brush-on
There are two main methods for sealing diamond paintings: spray-on sealers and brush-on sealers. Each method has its advantages and considerations. Spray-on sealers, such as ModPodge Spray Acrylic Sealer, offer ease of application and even coverage.
They do not require direct contact with the canvas, which can be beneficial in preventing accidental smudging or dislodging of the diamond drills.
On the other hand, brush-on sealers, like ModPodge Super Glossy or DuraClear Gloss Varnish, allow for more control over the application process. The brush can reach into the grooves between the diamonds, ensuring a thin and even layer of sealant.
Recommended Sealants
When choosing a sealant for your diamond painting, several brands and products are commonly recommended by crafters. For spray-on sealers, ModPodge Spray Acrylic Sealer and Tombow Aqua liquid glue are popular choices. They provide a clear protective layer without yellowing over time.
If you prefer a brush-on sealer, options like ModPodge Super Glossy, DuraClear Gloss Varnish, MinMax Polyurethane, and MinMax Polycrylic are well-regarded. These sealants offer both protection and a glossy finish, preserving the brilliance of the diamond drills.
Steps to Seal Your Diamond Painting
Once you have selected the appropriate sealant for your diamond painting, follow these steps to ensure an effective and successful sealing process:
Considerations for Displaying Sealed Diamond Paintings
If you choose to seal your diamond painting, consider how you plan to display it. Sealed paintings can be displayed without glass protection, allowing for alternative framing options such as magnetic frames or mounting the canvas directly on a wooden board.
These options showcase the sealed painting’s texture and provide a unique display experience. Keep in mind that sealing the painting may slightly reduce the overall reflectiveness and shine, but it offers added stability and protection.
Maintaining Sealed Diamond Paintings
Once your diamond painting is sealed, it’s important to know how to maintain its appearance and condition. Sealed paintings are generally easier to clean compared to unsealed ones. Use a damp cloth to gently wipe the surface of the painting when needed, as the sealant creates a protective barrier against dirt and debris.
Avoid using abrasive materials or harsh chemicals that may damage the sealant or affect the diamond drills’ adhesion. By following proper cleaning practices, you can ensure the longevity and preservation of your sealed diamond painting.
Conclusion
In conclusion, sealing your diamond painting is a personal choice that depends on various factors. While sealing offers protection and easier maintenance, it does come with a trade-off in terms of shine and sparkle.
Consider the quality of your canvas and adhesive, as well as your preferred display method, before deciding whether to seal your diamond painting.
If you choose to seal, follow the recommended steps and use the appropriate sealant for optimal results. With proper sealing and maintenance, you can enhance the longevity and beauty of your diamond painting masterpiece.