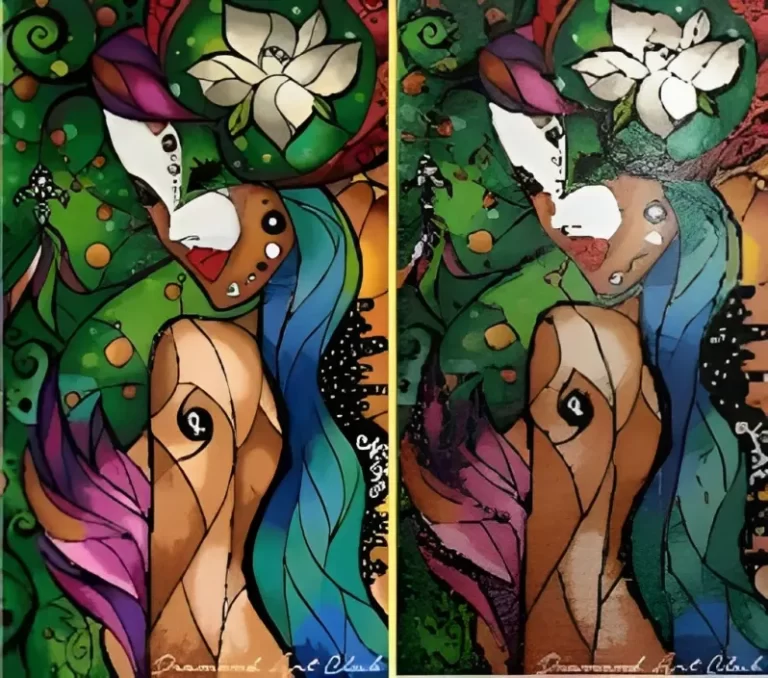
Diamond painting is a popular craft activity that combines the intricacy of cross-stitch with the sparkle of diamonds. It has gained immense popularity among art enthusiasts and hobbyists alike.
In this article, we will explore the essential tools required for diamond painting and provide a step-by-step guide on how to use them effectively.
Before we delve into the process of diamond painting, let’s familiarize ourselves with the essential tools that are typically included in a diamond painting kit. These tools ensure precise diamond placement and a smooth crafting experience.
Diamond Applicator
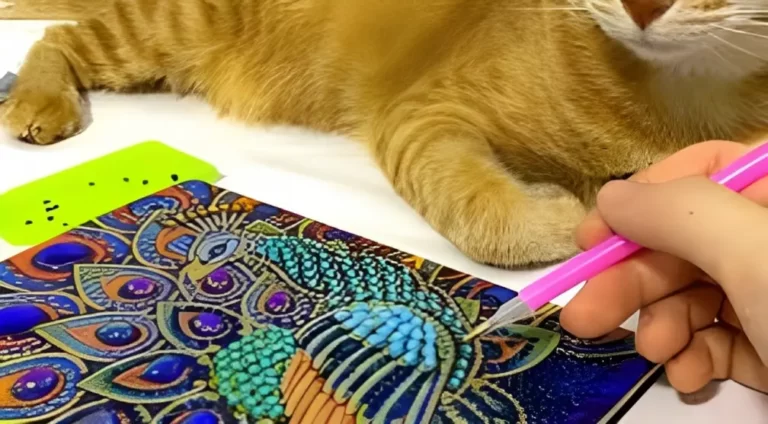
The diamond applicator, also known as a stylus or pen, is a slender tool with a small, slanted tip designed to pick up and place diamonds onto the canvas. It is often equipped with a wax or adhesive-filled chamber that helps the diamonds adhere to the applicator.
Diamond Tray
The diamond tray is a flat container with multiple sections or grooves, each corresponding to a different color of diamond. It allows you to pour out a small quantity of diamonds and organize them for easy access during the crafting process.
Wax or Adhesive Pad
The wax or adhesive pad is used to create a sticky surface on the diamond applicator. By lightly touching the applicator tip to the pad, you can pick up diamonds with ease and precision.
Tweezers
While tweezers are not always included in diamond painting kits, they can be useful for more intricate designs or for fixing misplaced diamonds. Tweezers provide an alternative method for picking up and placing diamonds, offering more control and precision.
Preparing the Canvas
Once you have unboxed your diamond painting kit, it’s time to prepare the canvas for crafting. Follow these steps to ensure a smooth and enjoyable experience:
Unrolling and Flattening the Canvas: Gently unroll the canvas and lay it on a clean, flat surface. Use your hands or a clean cloth to smooth out any creases or wrinkles.
Inspection of Materials: Carefully inspect the contents of your kit, including the canvas, diamonds, and tools, to ensure everything is in good condition and nothing is missing.
Securing the Canvas: Some kits provide adhesive edges or a plastic cover to protect the adhesive layer of the canvas. If not included, you can use painter’s tape or clips to secure the edges and prevent them from curling.
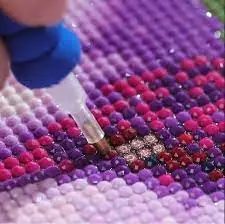
Applying the Diamonds
Now that your canvas is ready, let’s dive into the process of applying the diamonds:
Pouring the Diamonds onto the Tray: Open the packets of diamonds and pour them into the sections of the diamond tray. Be careful not to mix the colors, as this may make it difficult to identify the correct diamonds later.
Using the Diamond Applicator: If your diamond applicator has a wax or adhesive-filled chamber, remove the cover and press the applicator tip lightly onto the wax or adhesive pad. This will create a sticky surface for picking up diamonds.
Picking Up and Placing Diamonds on the Canvas: Press the applicator tip onto the flat side of a diamond, ensuring it adheres to the sticky surface. Carefully position the diamond onto the corresponding symbol on the canvas and gently press it down. Repeat this process for each diamond, working one color at a time.
Techniques for Efficient Diamond Placement: To work more efficiently, start from the bottom of the canvas and move upward. This prevents accidentally smudging completed sections. Additionally, if you’re working on a large or complex design, consider using a multi-placer tool that allows you to pick up multiple diamonds at once.
Finishing the Diamond Painting
As you near the completion of your diamond painting, it’s important to ensure the diamonds are securely in place:
Securing Loose Diamonds: If you notice any loose diamonds after completing a section, use the diamond applicator or tweezers to press them firmly onto the adhesive canvas.
Applying Pressure to Ensure Adhesion: Once you have placed all the diamonds, use a clean cloth or your hands to apply gentle pressure over the entire canvas. This helps the diamonds adhere firmly to the adhesive.
Using a Rolling Pin or Book for Flatness: To achieve a flat and smooth finish, place a clean cloth over the completed canvas and roll a rolling pin or a heavy book across it. The pressure applied will help the diamonds settle securely.
Trimming Excess Canvas: If your diamond painting kit includes excess canvas around the edges, carefully trim it off using a pair of scissors. Be cautious not to cut into the design itself.
Cleaning and Maintenance
To keep your diamond painting looking its best, consider the following cleaning and maintenance tips:
Removing Dust and Debris: Periodically dust your completed diamond painting using a soft, lint-free cloth or a feather duster. Avoid using water or cleaning solutions, as they may damage the diamonds or the adhesive.
Storing the Diamond Painting Properly: To prevent dust or damage, store your completed diamond painting in a sealed container or a frame. If using a frame, ensure it has a protective covering to keep the artwork safe.
Tips for Preserving the Artwork: Avoid exposing your diamond painting to direct sunlight for extended periods, as it may cause the colors to fade. Additionally, keep it away from areas of high humidity or extreme temperature fluctuations.
Troubleshooting
While diamond painting is generally a straightforward process, you may encounter some issues along the way. Here are a few troubleshooting tips:
Dealing with Misplaced Diamonds: If you accidentally place a diamond in the wrong spot, carefully remove it using the diamond applicator or tweezers. Gently lift the diamond, taking care not to damage the adhesive, and place it in the correct position.
Fixing Adhesive Issues: If you find that the adhesive on your canvas is not sticky enough, you can use a small amount of clear-drying glue to secure loose diamonds. Apply the glue sparingly and let it dry completely before handling the canvas.
Repairing Damaged Canvas: In the unfortunate event of a torn or damaged canvas, contact the manufacturer or supplier of the kit for assistance. They may be able to provide you with a replacement canvas or suggest alternative solutions.
Advanced Techniques and Tips
For those looking to take their diamond painting skills to the next level, consider exploring these advanced techniques and tips:
Working with Larger or More Complex Designs: Larger or more intricate diamond paintings may require additional patience and attention to detail. Break down the project into manageable sections and work on them one at a time to avoid feeling overwhelmed.
Blending Colors and Creating Gradients: Some diamond paintings may require blending colors to achieve realistic shading or create smooth gradients. Use a small tray or a piece of wax paper to mix and blend different colored diamonds before placing them on the canvas.
Adding Additional Details: If you wish to add extra details or embellishments to your diamond painting, consider using rhinestones, beads, or other decorative elements. Ensure these additional elements are securely adhered to the canvas to prevent them from falling off over time.
Conclusion
Diamond painting is a captivating and creative craft that allows individuals to create stunning works of art using tiny sparkling diamonds. By following the steps outlined in this article and utilizing the essential tools, you can embark on a diamond painting journey with confidence and enjoyment. Whether you’re a beginner or an experienced crafter, diamond painting offers a therapeutic and rewarding experience, resulting in beautiful artworks that can be cherished for years to come.
Frequently Asked Questions
While most diamond painting kits come with pre-designed patterns, there are specialized tools and software available that allow you to create custom designs. You can convert personal photos or artwork into diamond painting patterns using these tools.
The time required to complete a diamond painting depends on various factors, including the size of the canvas, the complexity of the design, and the individual’s crafting speed. Smaller and simpler designs may take a few hours, while larger and more intricate ones can take several weeks or even months.
If you run out of diamonds while working on your diamond painting, contact the manufacturer or supplier of the kit. They can provide you with additional diamonds or suggest alternative solutions to complete your artwork.
Yes, framing your completed diamond painting is a popular option for display and preservation. Choose a frame that complements the size and style of your artwork, ensuring it has a protective covering, such as glass or acrylic, to prevent dust and damage.
Diamond painting can be a fun and engaging activity for children, but it may require adult supervision, especially for younger children. Ensure they handle the small diamond pieces safely and avoid ingestion. Choose age-appropriate designs and tools that suit their abilities.
I'm William, a diamond painting enthusiast. Through my site diamond-paint.com, I offer tips, tricks, and resources for creating stunning works of art. Join me on this journey of self-expression and artistic fulfillment!
Diamond painting is a popular craft that combines the joy of painting by numbers and the precision of cross-stitch. However, there may be instances where you find yourself needing to decrease the size of a diamond painting. Whether you want to fit the painting into a specific frame or create a smaller version of a larger…
Diamond painting is a captivating and relaxing art form that allows you to create stunning masterpieces by placing small resin diamonds onto a canvas. Once you’ve completed your diamond painting, it’s essential to take the necessary steps to preserve its beauty and longevity. One crucial aspect of preserving your artwork is sealing the edges properly….
Diamond painting is a popular craft that allows you to create stunning and intricate artwork using small plastic gems. One of the most fascinating variations of this craft is the 5D diamond painting. In this article, we will explore the step-by-step process of how to do a 5D diamond painting and create your own dazzling…
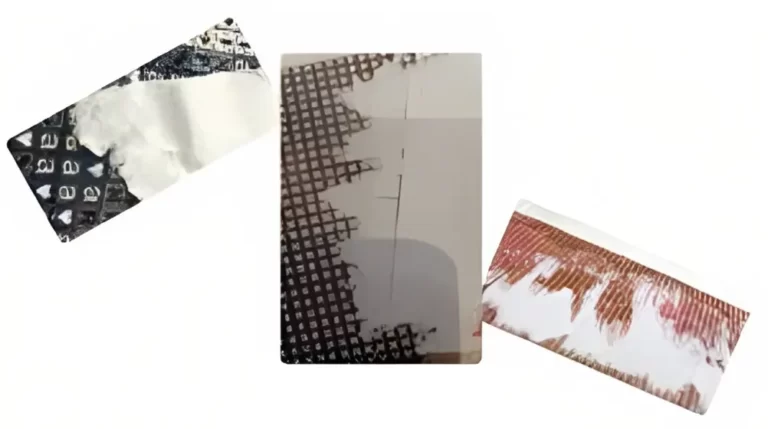
Diamond painting is a popular craft that involves creating intricate and colorful mosaic-like artworks using small resin diamonds. However, sometimes when working on a diamond painting project, you may encounter issues with paper residue getting stuck to the canvas. This can be frustrating and hinder the progress of your artwork. In this article, we will…
Diamond painting has become a popular craft activity that combines the joy of painting with the sparkle of diamonds. If you have completed a diamond painting masterpiece or are planning to start one, you might be wondering how to protect and preserve your artwork for years to come. In this article, we will guide you…
Diamond painting has become a beloved artistic hobby for individuals seeking a creative outlet. The meticulous process of placing colorful diamond drills onto a canvas to create stunning mosaic-like artworks is not only relaxing but also highly rewarding. In this guide, we’ll explore how to take your diamond painting to the next level by incorporating…


4 Comments