
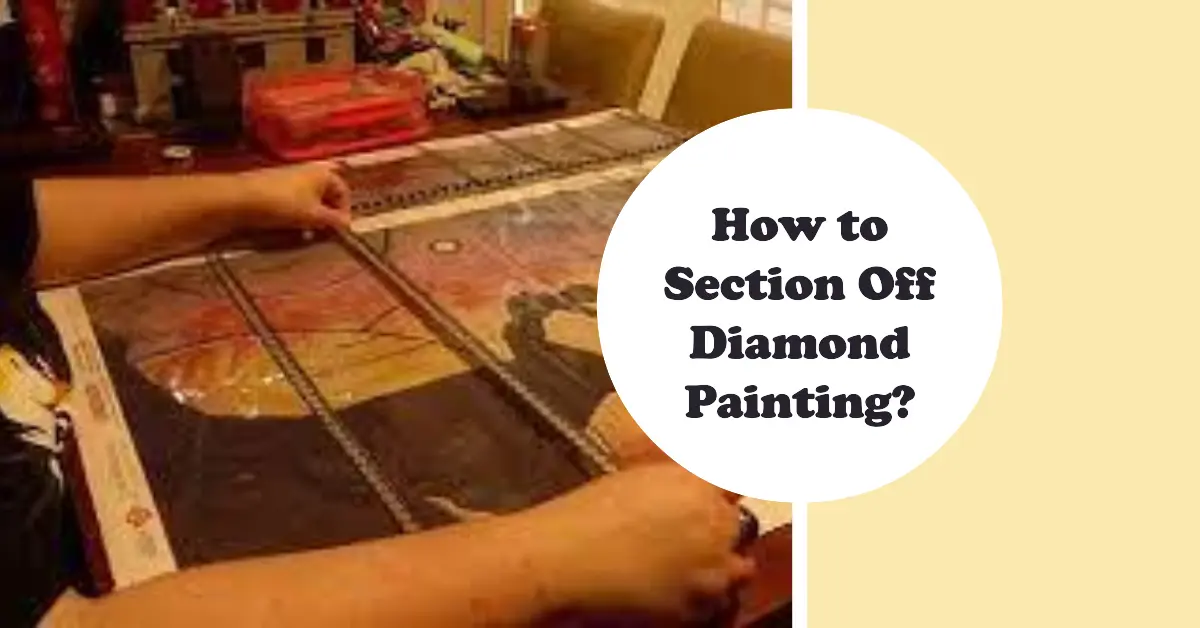
How to Section Off Diamond Painting?
Diamond painting is a popular and enjoyable craft that allows you to create stunning artwork using small resin diamonds. To achieve the best results, it’s important to properly section off your diamond painting.
In this article, we will guide you through the process and provide valuable tips for effective sectioning.
Understanding Diamond Painting
Before we dive into sectioning off, let’s briefly understand the basics of diamond painting. It’s a craft that originated in Asia and has gained immense popularity worldwide.
The materials required for diamond painting include a canvas with a printed design, diamond gems, a tray for organizing the diamonds, an applicator tool, wax or tweezers for picking up the diamonds, and adhesive tape for sectioning.
How to Section Off Diamond Painting?
Sectioning off your diamond painting provides several benefits, such as easier management of diamonds, reduced risk of errors, and enhanced organization and efficiency. Here are step-by-step instructions to help you section off your diamond painting effectively:
Step 1: Remove all the contents from the package and check that you have everything you need.
Step 2: Lay the canvas on a clean and flat surface. Keep the plastic film intact for now to preserve its stickiness.
Step 3: Find the middle of the canvas and use masking tape or washi tape to divide it into sections. Apply the tape vertically and horizontally, creating a grid-like pattern. This will allow you to peel off the clear cover in sections without exposing a large area.
Step 4: Starting from a corner, peel back a section of the plastic film. Cut in the middle of each tape section and peel back a small portion to begin applying the diamonds.
Step 5: Work with one color at a time to keep things organized. Add a small number of diamonds to the tray and shake gently from side to side to line them up in the grooves.
Step 6: Dip the tip of the applicator tool in wax or use tweezers to pick up the diamonds easily.
Step 7: Press the applicator tool or tweezers on the rounded side of a diamond to pick it up.
Step 8: Peel back the plastic film from the corresponding symbol on the canvas and carefully press the diamond onto it. Repeat the process until the section is complete.
Step 9: Move on to the next section, peeling back the plastic film as you progress. Remember to reseal the exposed sections with tape to prevent dust or accidental spills.
Tips for Effective Sectioning
To ensure smooth sectioning and a hassle-free diamond painting experience, consider the following tips:
Choosing the right tape: Opt for masking tape or washi tape that is easy to remove without leaving residue. Avoid using strong adhesive tapes that may damage the canvas.
Dividing the canvas: Create an evenly spaced grid pattern using the tape, taking into account the size of the canvas and the level of detail in the design.
Ensuring accurate alignment: Carefully align the tape with the edges of the canvas to maintain a clean and professional appearance.
Advantages of Sectioning Off
Sectioning off your diamond painting offers several advantages:
Easy management of diamonds: Sectioning allows you to focus on one area at a time, reducing the chance of misplacing diamonds or mixing up colors.
Reduced risk of errors: By working on smaller sections, you can concentrate on the specific symbols and colors, minimizing the possibility of mistakes.
Enhanced organization and efficiency: Sectioning helps you stay organized throughout the project, making it easier to track your progress and locate the required diamonds.
Common Mistakes to Avoid
While sectioning off your diamond painting, be mindful of these common mistakes:
Removing tape prematurely: Avoid peeling off the tape before completing the section, as this can lead to confusion and difficulties in aligning the diamonds correctly.
Uneven sectioning: Ensure that your tape lines are straight and evenly spaced to maintain consistency across the canvas.
Mishandling of diamonds: Handle the diamonds carefully to prevent them from falling or getting mixed up.
Conclusion
Sectioning off your diamond painting is a valuable technique that enhances the overall process and helps you achieve better results. By following the step-by-step instructions and implementing the tips provided, you can enjoy a more organized and efficient diamond painting experience. So gather your materials, divide your canvas, and let your creativity shine through each section!

One Comment